Installing Unreal Engine

In order to understand and use the content on this page, make sure you are familiar with the following topics:
On this page
- Download and Install the Epic Games Launcher
- Create an Epic Games Account
- Install Unreal Engine
- Launch Unreal Engine
This page describes how to download and install Unreal Engine.
The instructions below are for Windows and macOS. We currently don’t provide a binary installer of Unreal Engine for Linux.
To use Unreal Engine on Linux, you can compile it from source. For more information, see the Linux Quick Start Guide documentation.
To download and install Unreal Engine, you need to:
- Download and install the Epic Games Launcher.
- Sign up for an Epic Games account, if you don’t have one.
- Sign in to the Epic Games Launcher.
- Install Unreal Engine.
Download and Install the Epic Games Launcher
The Unreal Engine tab in the Epic Games Launcher is where you manage all of your Unreal Engine (UE) installations. You can have multiple versions of UE installed on the same computer.
To download and install the Launcher, follow these steps:
- Access the Download Unreal Engine page.
- Select the license type that best matches how you intend to use UE. There are two types of licenses available:
- Publishing, if you plan to make games.
- Creators, if you plan to make other types of content.
You can learn more about the different kinds of licensing available from the Unreal Engine FAQ .
In addition to the Launcher, this may also install other programs you require to run Unreal Engine, such as DirectX.
Create an Epic Games Account
After the setup program installs the Epic Games Launcher on your machine, you will be prompted to sign in with your Epic Games account.
If you have an account, sign in to the Launcher and continue to the next section.
If you don’t have an account, click Sign Up to create one. You can sign up for an Epic Games account with your email, or with a supported social media or gaming platform account.
Installing Unreal Engine

In order to understand and use the content on this page, make sure you are familiar with the following topics:
On this page
- Installing Unreal Engine
- Changing the Installation Location Using the Epic Games Launcher
Choose your operating system:
This page describes how to download and install Unreal Engine.
Installing Unreal Engine
To download and install Unreal Engine, you need to:
- Download and install the Epic Games Launcher.
- Sign up for an Epic Games account, if you don’t have one.
- Sign in to the Epic Games Launcher.
- Install Unreal Engine.
Download and Install the Epic Games Launcher
The Unreal Engine tab in the Epic Games Launcher is where you manage all of your Unreal Engine (UE) installations. You can have multiple versions of UE installed on the same computer.
To download and install the Launcher, follow these steps:
- Access the Download Unreal Engine page.
- Select the license type that best matches how you intend to use UE. There are two types of licenses available:
- Publishing, if you plan to make games.
- Creators, if you plan to make other types of content.
You can learn more about the different kinds of licensing available from the Unreal Engine FAQ .
In addition to the Launcher, this may also install other programs you require to run Unreal Engine, such as DirectX.
Create an Epic Games Account
After the setup program installs the Epic Games Launcher on your machine, you will be prompted to sign in with your Epic Games account.
If you have an account, sign in to the Launcher and continue to the next section.
If you don’t have an account, click Sign Up to create one. You can sign up for an Epic Games account with your email, or with a supported social media or gaming platform account.

Click image to expand.
You can also proceed without creating an account by clicking Sign In Later. However, you will not be able to download or use Unreal Engine without an account.
Your account information is processed in accordance with the Epic Games Privacy Policy .
After you’ve created your account, Sign In to the Launcher.
Install Unreal Engine
Now that you’ve signed in to the Epic Games Launcher, you’re ready to install Unreal Engine.
-
Click the Unreal Engine tab inside the Epic Games Launcher, then click the Install Engine button.

Click image to expand.

Click image to expand.
- Platform support
- Starter content
- Debug symbols
- Engine source code
You can add or remove components from an installed version of Unreal Engine at any time, by clicking the drop-down arrow next to the Launch button for that version, then selecting Options.
Before you install Unreal Engine, make sure you have enough disk space. Requirements vary depending on the engine components you select. The Options screen will show you how much space you need for the installer download, as well as the engine itself.

Click image to expand.
After you finish selecting the engine components you need, click the Apply button.
You can have multiple versions of Unreal Engine installed. To add more versions, in the Library tab, click the Add (+) button next to ENGINE VERSIONS, then select the Engine version you want to install from the drop-down and click Install.

Click image to expand.
Launch Unreal Engine
After the install completes, click the Launch button to open Unreal Engine.

Click image to expand.
Congratulations! You are now ready to start using Unreal Engine.
To download and install Unreal Engine, you need to:
- Download and install the Epic Games Launcher.
- Sign up for an Epic Games account, if you don’t have one.
- Sign in to the Epic Games Launcher.
- Install Unreal Engine.
Download and Install the Epic Games Launcher
The Unreal Engine tab in the Epic Games Launcher is where you manage all of your Unreal Engine (UE) installations. You can have multiple versions of UE installed on the same computer.
To download and install the Launcher, follow these steps:
- Access the Download Unreal Engine page.
- Select the license type that best matches how you intend to use UE. There are two types of licenses available:
- Publishing, if you plan to make games.
- Creators, if you plan to make other types of content.
You can learn more about the different kinds of licensing available from the Unreal Engine FAQ .
Create an Epic Games Account
After the setup program installs the Epic Games Launcher on your machine, you will be prompted to sign in with your Epic Games account.
If you have an account, sign in to the Launcher and continue to the next section.
If you don’t have an account, click Sign Up to create one. You can sign up for an Epic Games account with your email, or with a supported social media or gaming platform account.

Click image to expand.
You can also proceed without creating an account by clicking Sign In Later. However, you will not be able to download or use Unreal Engine without an account.
Your account information is processed in accordance with the Epic Games Privacy Policy .
After you’ve created your account, Sign In to the Launcher.
Install Unreal Engine
Now that you’ve signed in to the Epic Games Launcher, you’re ready to install Unreal Engine.
-
Click the Unreal Engine tab inside the Epic Games Launcher, then click the Install Engine button.

Click image to expand.

Click image to expand.
- Platform support
- Starter content
- Debug symbols
- Engine source code
You can add or remove components from an installed version of Unreal Engine at any time, by clicking the drop-down arrow next to the Launch button for that version, then selecting Options.
Before you install Unreal Engine, make sure you have enough disk space. Requirements vary depending on the engine components you select. The Options screen will show you how much space you need for the installer download, as well as the engine itself.

Click image to expand.
After you finish selecting the engine components you need, click the Apply button.
You can have multiple versions of Unreal Engine installed. To add more versions, in the Library tab, click the Add (+) button next to ENGINE VERSIONS, then select the Engine version you want to install from the drop-down and click Install.

Click image to expand.
Launch Unreal Engine
After the install completes, click the Launch button to open Unreal Engine.

Click image to expand.
Congratulations! You are now ready to start using Unreal Engine.
Unreal Engine on Linux supports precompiled installed builds as well as source code builds. For information about using source builds, refer to Building Unreal Engine from Source .
To use a precompiled build, follow these steps:

-
Open the Unreal Engine for Linux page. It will prompt you to to create or sign into an Epic Games account. If you already have one, sign in to access the page. If you don’t have an account, click Sign Up to create one.

You can sign up for an Epic Games account with your email, or with a supported social media or gaming platform account.

Download the .zip file containing the version of Unreal Engine that you need.
Changing the Installation Location Using the Epic Games Launcher
If you have a previous installation of Unreal Engine on your disk, but the Epic Games Launcher does not recognize it, follow the steps below to register this installation with the Launcher. You can also use this method to move an existing installation to a new location on disk.
-
In the Epic Games Launcher, click the Add (+) button to add a new version. Select the version that corresponds to the Unreal Engine version you want to register or move.
Click image to expand.
Click image to expand.


The tile should now display a Resume button.
After you’ve completed the steps above, the Launcher will start verifying the installation. It will also download any optional components you selected that it can’t find in the installation folder. This might take some time.
When this process completes, you will be able to launch this version of Unreal Engine from the Epic Games Launcher.
If you have a previous installation of Unreal Engine on your disk, but the Epic Games Launcher does not recognize it, follow the steps below to register this installation with the Launcher. You can also use this method to move an existing installation to a new location on disk.
-
In the Epic Games Launcher, click the Add (+) button to add a new version. Select the version that corresponds to the Unreal Engine version you want to register or move.
Click image to expand.
Click image to expand.
The tile should now display a Resume button.
After you’ve completed the steps above, the Launcher will start verifying the installation. It will also download any optional components you selected that it can’t find in the installation folder. This might take some time.
When this process completes, you will be able to launch this version of Unreal Engine from the Epic Games Launcher.
The Epic Games Launcher is not available on Linux.
Relocating Unreal Engine on Linux works the same way as relocating any other application.
Help shape the future of Unreal Engine documentation! Tell us how we’re doing so we can serve you better.
Installing Unreal Engine
In order to understand and use the content on this page, make sure you are familiar with the following topics:
On this page
- Installing Unreal Engine
- Changing the Installation Location Using the Epic Games Launcher
Choose your operating system:
This page describes how to download and install Unreal Engine.
Installing Unreal Engine
To download and install Unreal Engine, you need to:
- Download and install the Epic Games Launcher.
- Sign up for an Epic Games account, if you don’t have one.
- Sign in to the Epic Games Launcher.
- Install Unreal Engine.
Download and Install the Epic Games Launcher
The Unreal Engine tab in the Epic Games Launcher is where you manage all of your Unreal Engine (UE) installations. You can have multiple versions of UE installed on the same computer.
To download and install the Launcher, follow these steps:
- Access the Download Unreal Engine page.
- Select the license type that best matches how you intend to use UE. There are two types of licenses available:
- Publishing, if you plan to make games.
- Creators, if you plan to make other types of content.
You can learn more about the different kinds of licensing available from the Unreal Engine FAQ .
In addition to the Launcher, this may also install other programs you require to run Unreal Engine, such as DirectX.
Create an Epic Games Account
After the setup program installs the Epic Games Launcher on your machine, you will be prompted to sign in with your Epic Games account.
If you have an account, sign in to the Launcher and continue to the next section.
If you don’t have an account, click Sign Up to create one. You can sign up for an Epic Games account with your email, or with a supported social media or gaming platform account.

Click image to expand.
You can also proceed without creating an account by clicking Sign In Later. However, you will not be able to download or use Unreal Engine without an account.
Your account information is processed in accordance with the Epic Games Privacy Policy .
After you’ve created your account, Sign In to the Launcher.
Install Unreal Engine
Now that you’ve signed in to the Epic Games Launcher, you’re ready to install Unreal Engine.
-
Click the Unreal Engine tab inside the Epic Games Launcher, then click the Install Engine button.

Click image to expand.

Click image to expand.
- Platform support
- Starter content
- Debug symbols
- Engine source code
You can add or remove components from an installed version of Unreal Engine at any time, by clicking the drop-down arrow next to the Launch button for that version, then selecting Options.
Before you install Unreal Engine, make sure you have enough disk space. Requirements vary depending on the engine components you select. The Options screen will show you how much space you need for the installer download, as well as the engine itself.

Click image to expand.
After you finish selecting the engine components you need, click the Apply button.
You can have multiple versions of Unreal Engine installed. To add more versions, in the Library tab, click the Add (+) button next to ENGINE VERSIONS, then select the Engine version you want to install from the drop-down and click Install.

Click image to expand.
Launch Unreal Engine
After the install completes, click the Launch button to open Unreal Engine.

Click image to expand.
Congratulations! You are now ready to start using Unreal Engine.
To download and install Unreal Engine, you need to:
- Download and install the Epic Games Launcher.
- Sign up for an Epic Games account, if you don’t have one.
- Sign in to the Epic Games Launcher.
- Install Unreal Engine.
Download and Install the Epic Games Launcher
The Unreal Engine tab in the Epic Games Launcher is where you manage all of your Unreal Engine (UE) installations. You can have multiple versions of UE installed on the same computer.
To download and install the Launcher, follow these steps:
- Access the Download Unreal Engine page.
- Select the license type that best matches how you intend to use UE. There are two types of licenses available:
- Publishing, if you plan to make games.
- Creators, if you plan to make other types of content.
You can learn more about the different kinds of licensing available from the Unreal Engine FAQ .
Create an Epic Games Account
After the setup program installs the Epic Games Launcher on your machine, you will be prompted to sign in with your Epic Games account.
If you have an account, sign in to the Launcher and continue to the next section.
If you don’t have an account, click Sign Up to create one. You can sign up for an Epic Games account with your email, or with a supported social media or gaming platform account.

Click image to expand.
You can also proceed without creating an account by clicking Sign In Later. However, you will not be able to download or use Unreal Engine without an account.
Your account information is processed in accordance with the Epic Games Privacy Policy .
After you’ve created your account, Sign In to the Launcher.
Install Unreal Engine
Now that you’ve signed in to the Epic Games Launcher, you’re ready to install Unreal Engine.
-
Click the Unreal Engine tab inside the Epic Games Launcher, then click the Install Engine button.

Click image to expand.

Click image to expand.
- Platform support
- Starter content
- Debug symbols
- Engine source code
You can add or remove components from an installed version of Unreal Engine at any time, by clicking the drop-down arrow next to the Launch button for that version, then selecting Options.
Before you install Unreal Engine, make sure you have enough disk space. Requirements vary depending on the engine components you select. The Options screen will show you how much space you need for the installer download, as well as the engine itself.

Click image to expand.
After you finish selecting the engine components you need, click the Apply button.
You can have multiple versions of Unreal Engine installed. To add more versions, in the Library tab, click the Add (+) button next to ENGINE VERSIONS, then select the Engine version you want to install from the drop-down and click Install.

Click image to expand.
Launch Unreal Engine
After the install completes, click the Launch button to open Unreal Engine.

Click image to expand.
Congratulations! You are now ready to start using Unreal Engine.
Unreal Engine on Linux supports precompiled installed builds as well as source code builds. For information about using source builds, refer to Building Unreal Engine from Source .
To use a precompiled build, follow these steps:

-
Open the Unreal Engine for Linux page. It will prompt you to to create or sign into an Epic Games account. If you already have one, sign in to access the page. If you don’t have an account, click Sign Up to create one.

You can sign up for an Epic Games account with your email, or with a supported social media or gaming platform account.

Download the .zip file containing the version of Unreal Engine that you need.
Changing the Installation Location Using the Epic Games Launcher
If you have a previous installation of Unreal Engine on your disk, but the Epic Games Launcher does not recognize it, follow the steps below to register this installation with the Launcher. You can also use this method to move an existing installation to a new location on disk.
-
In the Epic Games Launcher, click the Add (+) button to add a new version. Select the version that corresponds to the Unreal Engine version you want to register or move.
Click image to expand.
Click image to expand.


The tile should now display a Resume button.
After you’ve completed the steps above, the Launcher will start verifying the installation. It will also download any optional components you selected that it can’t find in the installation folder. This might take some time.
When this process completes, you will be able to launch this version of Unreal Engine from the Epic Games Launcher.
If you have a previous installation of Unreal Engine on your disk, but the Epic Games Launcher does not recognize it, follow the steps below to register this installation with the Launcher. You can also use this method to move an existing installation to a new location on disk.
-
In the Epic Games Launcher, click the Add (+) button to add a new version. Select the version that corresponds to the Unreal Engine version you want to register or move.
Click image to expand.
Click image to expand.
The tile should now display a Resume button.
After you’ve completed the steps above, the Launcher will start verifying the installation. It will also download any optional components you selected that it can’t find in the installation folder. This might take some time.
When this process completes, you will be able to launch this version of Unreal Engine from the Epic Games Launcher.
The Epic Games Launcher is not available on Linux.
Relocating Unreal Engine on Linux works the same way as relocating any other application.
Help shape the future of Unreal Engine documentation! Tell us how we’re doing so we can serve you better.
Уроки по Unreal Engine 5: установка клиента, настройка проекта, системные требования
Первые шаги в Unreal Engine 5: ставим клиент, разбираемся в настройках и шаблонах для первого проекта.

Иллюстрация: Fortnite / Colowgee для Skillbox Media

Леон Балбери
Считает игры произведениями искусства и старается донести эту идею до широких масс. В свободное время стримит, рисует и часами зависает в фоторежимах.
Компания Epic Games выпустила движок Unreal Engine 5 в открытый доступ. По этому случаю редакция «Геймдев» Skillbox Media запускает серию уроков, которые помогут новичкам познакомиться с технологией. Впрочем, информация, описанная в этих гайдах, будет полезна и тем, кто задумывался об изучении Unreal Engine 4, поскольку многие возможности пятой итерации движка — скажем, навигация и работа с объектами — практически не изменились со времён предыдущей.
При написании материала использовалась версия движка 5.0.0. В следующих версиях могут быть незначительные изменения.
Краткая справка
Правила лицензирования движка, которые действовали для Unreal Engine 4, распространяются и на Unreal Engine 5. Пользователь получает движок бесплатно вместе с исходным кодом. Epic Games потребует 5% отчислений только в том случае, если проект заработает более миллиона долларов.
Unreal Engine 5 поддерживает обратную совместимость с проектами, созданными в версиях 4.26, 4.27, а также в той версии UE5, которая была выпущена в ранний доступ. Контент, созданный на базе уже неактуальных плагинов, может не загрузиться в новой версии движка.
Unreal Engine 5 работает на C++. Впрочем, для упрощения разработки в редакторе существует система визуального программирования — Blueprints, или блюпринты, где логика выстраивается путём последовательного соединения узлов — Nodes, или нодов. При таком подходе исключаются синтаксические ошибки, которые новички нередко допускают в коде. Блюпринты может освоить даже человек, не знакомый с программированием.
Если для проекта всё же необходимо использование С++, то потребуется установить Microsoft Visual Studio.
Системные требования Unreal Engine 5 во многом зависят от целей пользователя. Например, если вы задумали создать проект с использованием рендеринга на базе новой технологии Lumen, вам потребуется видеокарта с поддержкой трассировки лучей (линейки видеокарт NVIDIA RTX 20 и NVIDIA RTX 30, а также AMD RX‑6000 и выше). Кроме того, перед запуском редактора рекомендуется обновить драйверы видеокарты.

Установка и запуск
Скачать движок можно из лаунчера Epic Games. Достаточно зайти в раздел Unreal Engine и перейти во вкладку «Библиотека» (Library). Клиент уже доступен к установке во вкладке «Версии Unreal Engine» (Engine Versions). По умолчанию он будет установлен в папку /Epic Games на жёстком диске.
Если у вас нет учётной записи Epic Games, следует зарегистрироваться на официальном сайте и скачать лаунчер. После чего запустить его и установить редактор, как указано выше.
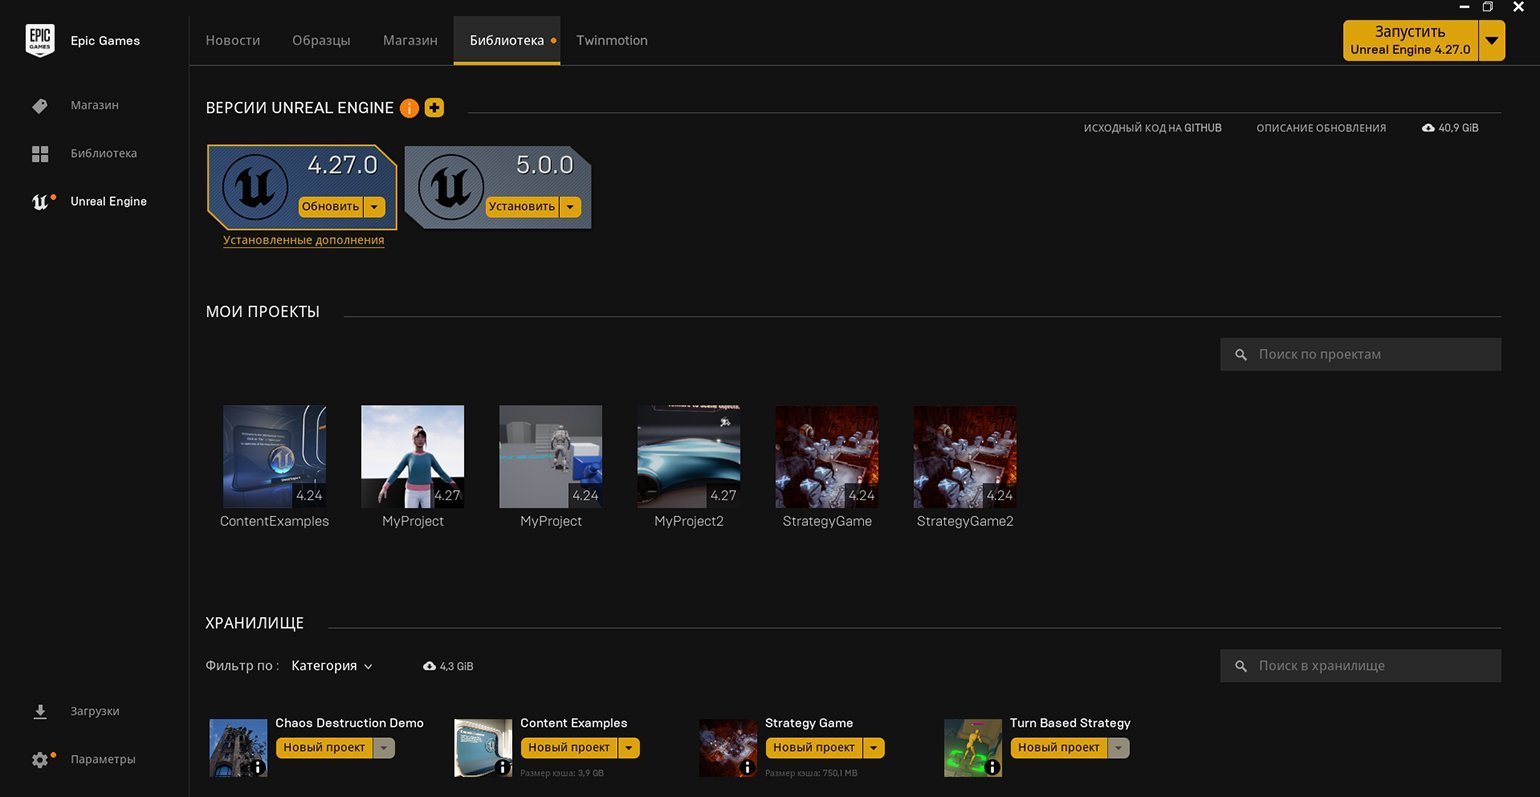
Кроме версий движка в «Библиотеке» есть раздел «Мои проекты» (My Projects). Здесь собраны все ваши проекты на Unreal Engine всех версий. В этом окне с ними можно проводить базовые манипуляции. Щёлкнув правой кнопкой мыши по иконке проекта, его можно открыть, просмотреть содержимое в проводнике Windows, сделать копию, создать ярлык на рабочем столе для быстрого запуска или удалить.
Примечание
Удалённые проекты не отправляются в корзину, как, например, файлы, удалённые в проводнике Windows. Восстановить их невозможно.
«Хранилище» (Vault) содержит все плагины и ассеты, скачанные из «Магазина» (Marketplace). В последний можно зайти, щёлкнув по одноимённой вкладке, расположенной слева от вкладки «Библиотека».
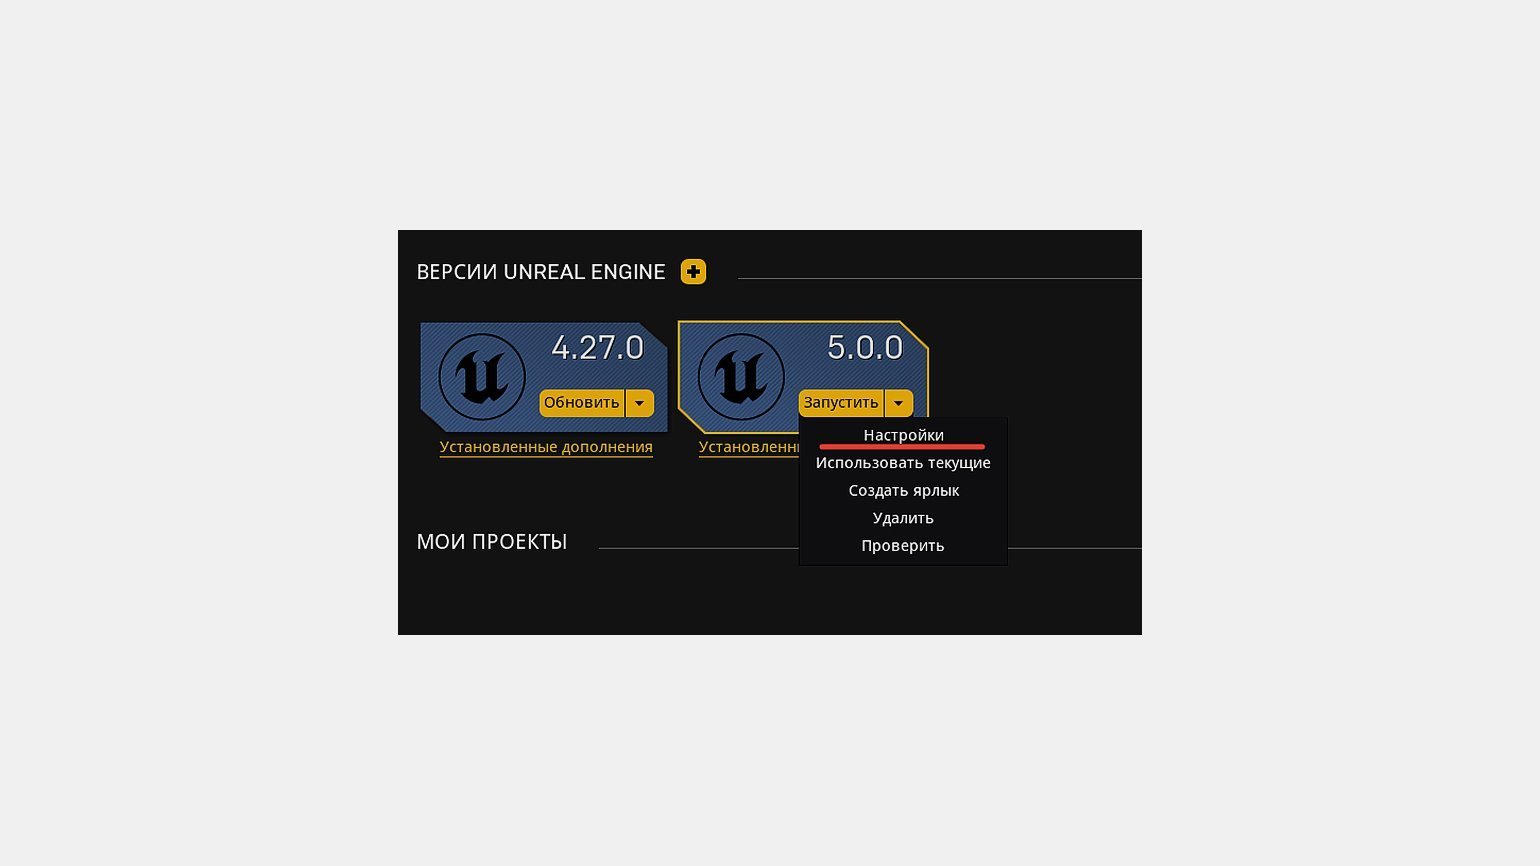
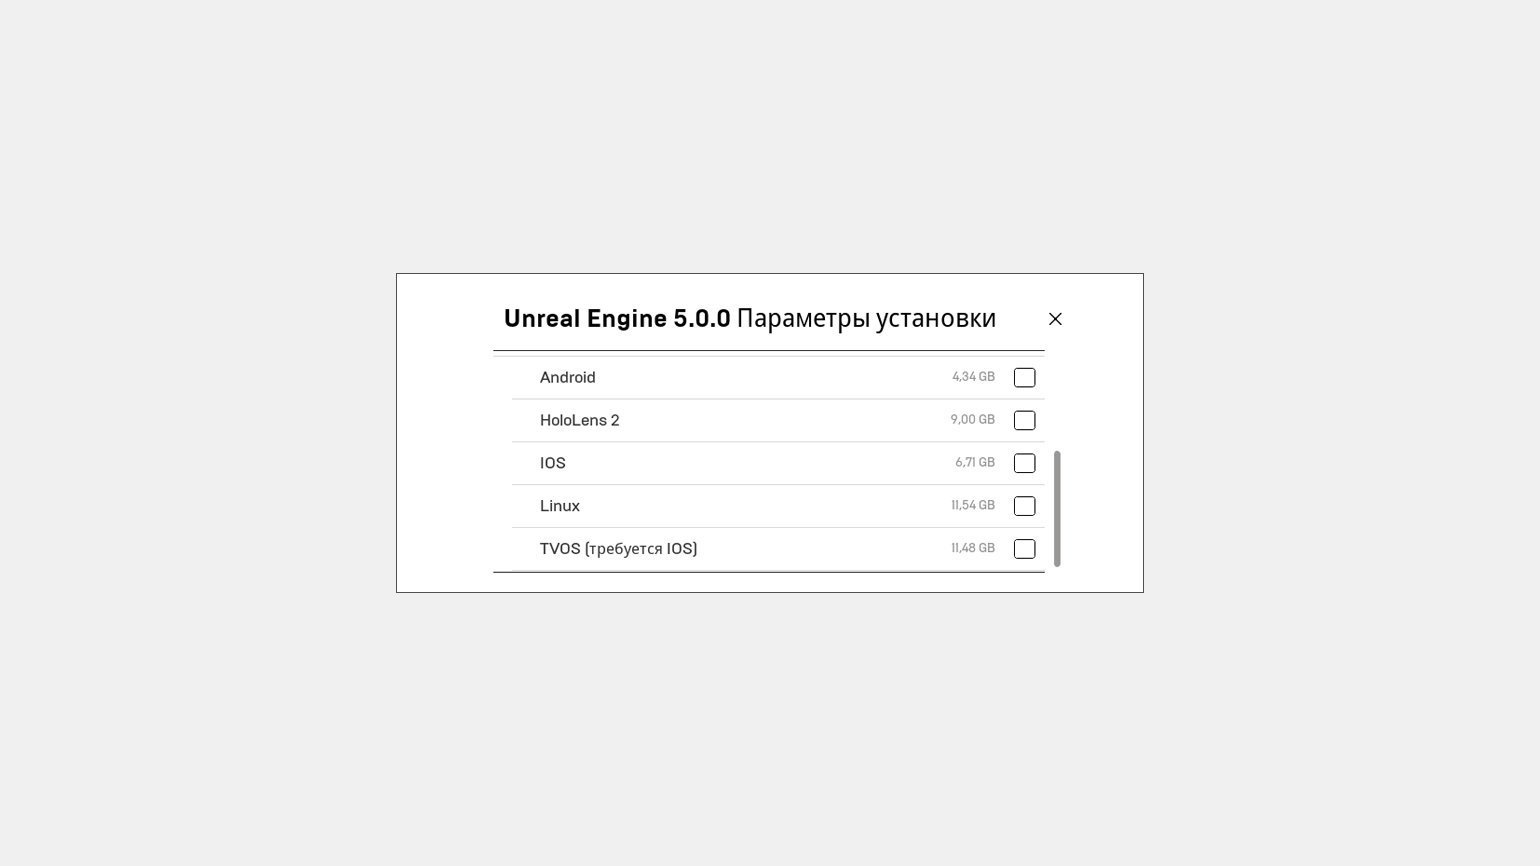
По умолчанию версия 5.0.0 занимает чуть больше 55 Гб на жёстком диске. Но размер легко сокращается до 32–36 Гб, если отключить ненужные сегменты в настройках установки — например, контент для дополнительных платформ.
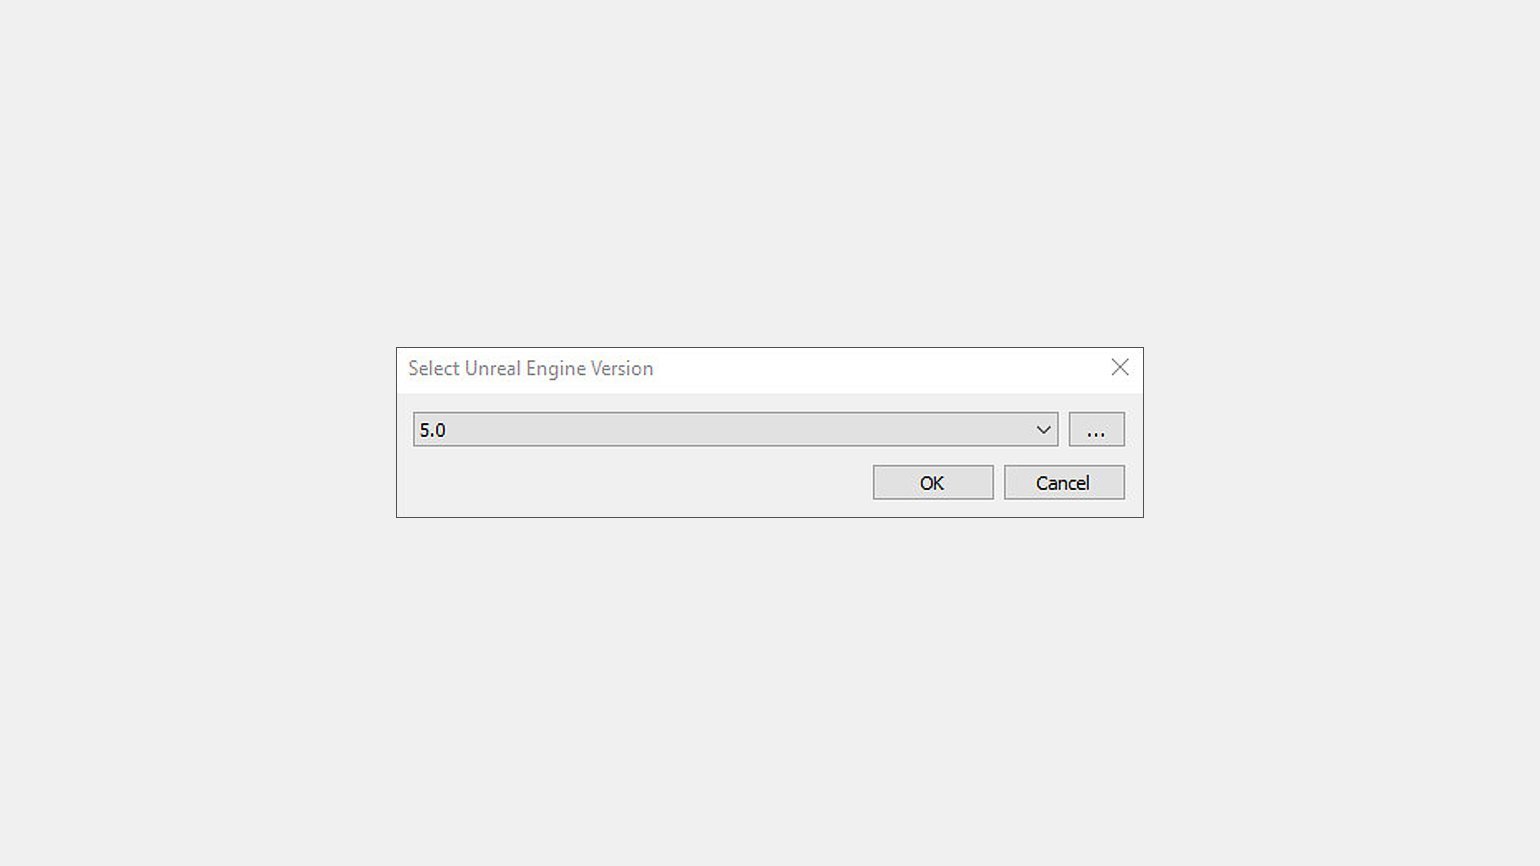
Если нужно запустить сторонний проект (скачанный из Интернета, скопированный с внешнего носителя), важно помнить, что клиент его не распознаёт. Потребуется автономный запуск: в папке с проектом необходимо открыть файл с расширением .uproject. Убедитесь, что на компьютере установлена версия движка, на которой сделан проект. Если её нет, выскочит всплывающее окно с доступными версиями, из которых можно выбрать подходящую.
Перед тем как запустить проект на другой версии движка, не забудьте сделать его резервную копию, так как неудачный запуск может привести к частичной порче или потере данных.
Стартовый экран
После запуска клиента вам потребуется подождать несколько минут, прежде чем запустится окно Unreal Project Browser. Содержание этого окна во многом схоже с браузером проектов из Unreal Engine 4. Как и в четвёртой версии, здесь стартовая страница может поразить новичка обилием вкладок. Рассмотрим их подробнее.
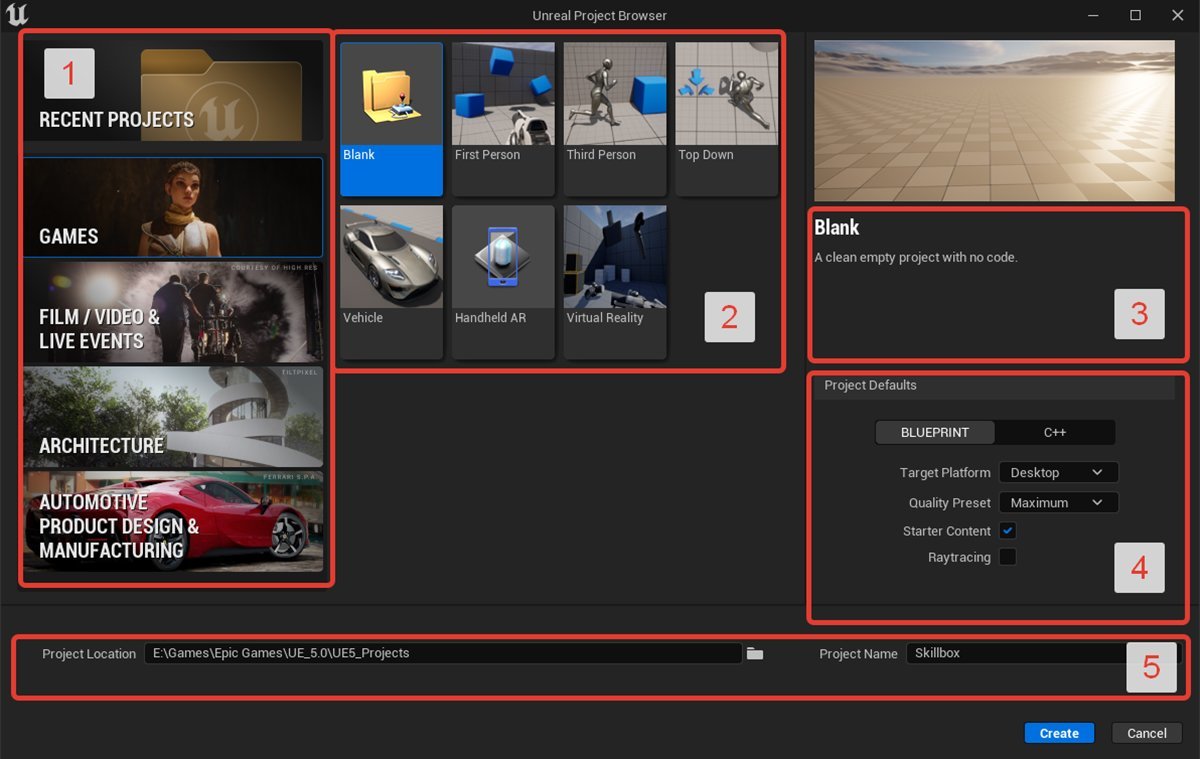
В области №1 расположены четыре категории шаблонов и Recent Projects, или «Недавние проекты» — секция, где можно посмотреть ваши уже созданные проекты, в том числе на Unreal Engine 4 (то же самое можно сделать и в «Библиотеке» лаунчера Epic Games). Если кликнуть по «Недавним проектам» правой кнопкой, откроется папка с их содержимым в проводнике Windows. Слева в самом низу есть пункт Always load last project on startup. Если отметить его, то при запуске редактора всегда будет загружаться последний проект, над которым вы работали.
Секции, которые находятся ниже Recent Projects, содержат шаблоны будущих проектов (№2). Правее (на скриншоте сверху — №3) отображена иллюстрация с описанием технических характеристик и назначения пресета.
Чуть ниже, в Project Defaults (№4), расположены дополнительные настройки будущего проекта. Рассмотрим их подробнее.
BLUEPRINT/С++ — выбор основы программирования. Здесь всё зависит от ваших навыков и предпочтений. На официальном сайте движка есть руководство как по использованию блюпринтов, так и по программированию на C++ в Visual Studio.
Target Platform — целевая платформа будущей игры. Доступно два варианта: Desktop и Mobile, то есть десктопная/консольная и мобильная версии соответственно.
Quality Preset — общее качество картинки. Maximum подойдёт для десктопных/консольных проектов, Scalable — для мобильных.
Starter Content — стартовый пак из примитивных объектов, текстур и мешей для экспериментов. Эти же объекты можно добавить вручную через Content Browser непосредственно в редакторе. Если поставить галочку и таким образом включить стартовый контент, объём проекта вырастет в несколько раз.
Ray‑Tracing — галочку необходимо ставить только в том случае, если проект поддерживает режим трассировки лучей. Возможности применения этой технологии в рамках движка расписаны в официальной документации.
В нижней части окна (на скриншоте — №5) можно указать путь сохранения и название будущего проекта.
Примечание
Некоторые из настроек Project Defaults недоступны для определённых шаблонов. Например, Handheld AR работает только на блюпринтах.
Группы шаблонов и их функционал
Рассмотрим шаблоны (на скриншоте — №1), которые делятся на четыре группы:
- Games;
- Film / Video & Live Events;
- Architecture;
- Automotive Product Design & Manufacturing.
Каждая из этих категорий содержит пустой шаблон Blank, без дополнительных ассетов и настроек.
Games
Здесь собраны пресеты для игровых проектов с подробным описанием и возможностью тестирования геймплея в реальном времени (опция доступна в редакторе).
Примечание
Несмотря на то, что шаблоны помечены как игровые, они вполне подойдут в качестве основы практически для любого проекта. Допустим, из шаблона Virtual Reality можно разработать и неигровое VR‑приложение — например, экскурсию по музею, — а Third Person станет хорошей основой для создания синематиков на движке.
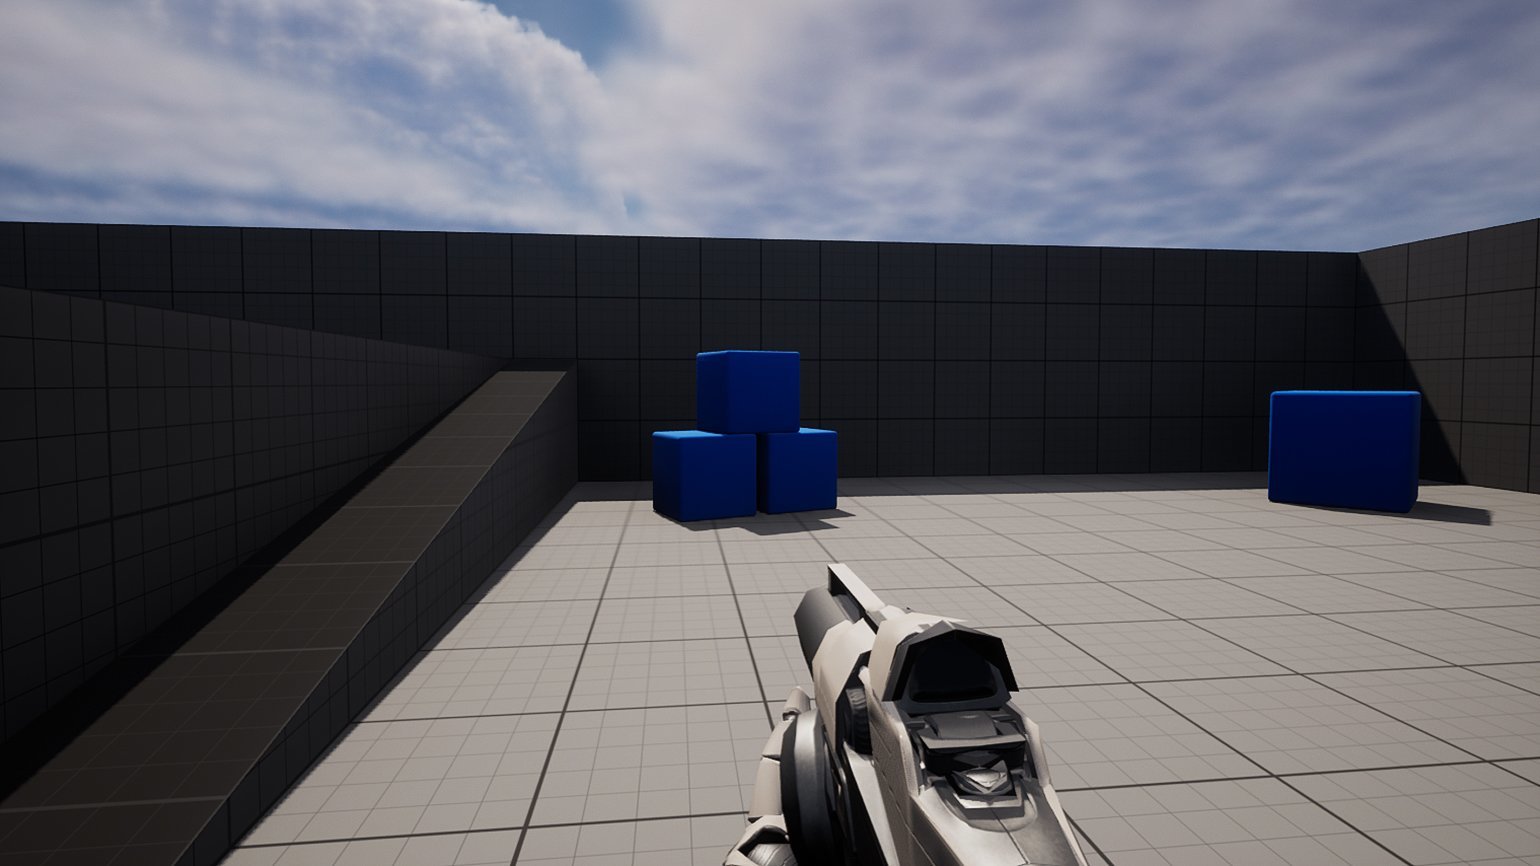
First Person — шаблон для игр от первого лица. По умолчанию в нём присутствует стандартная модель шутера с оружием и с физикой стрельбы.
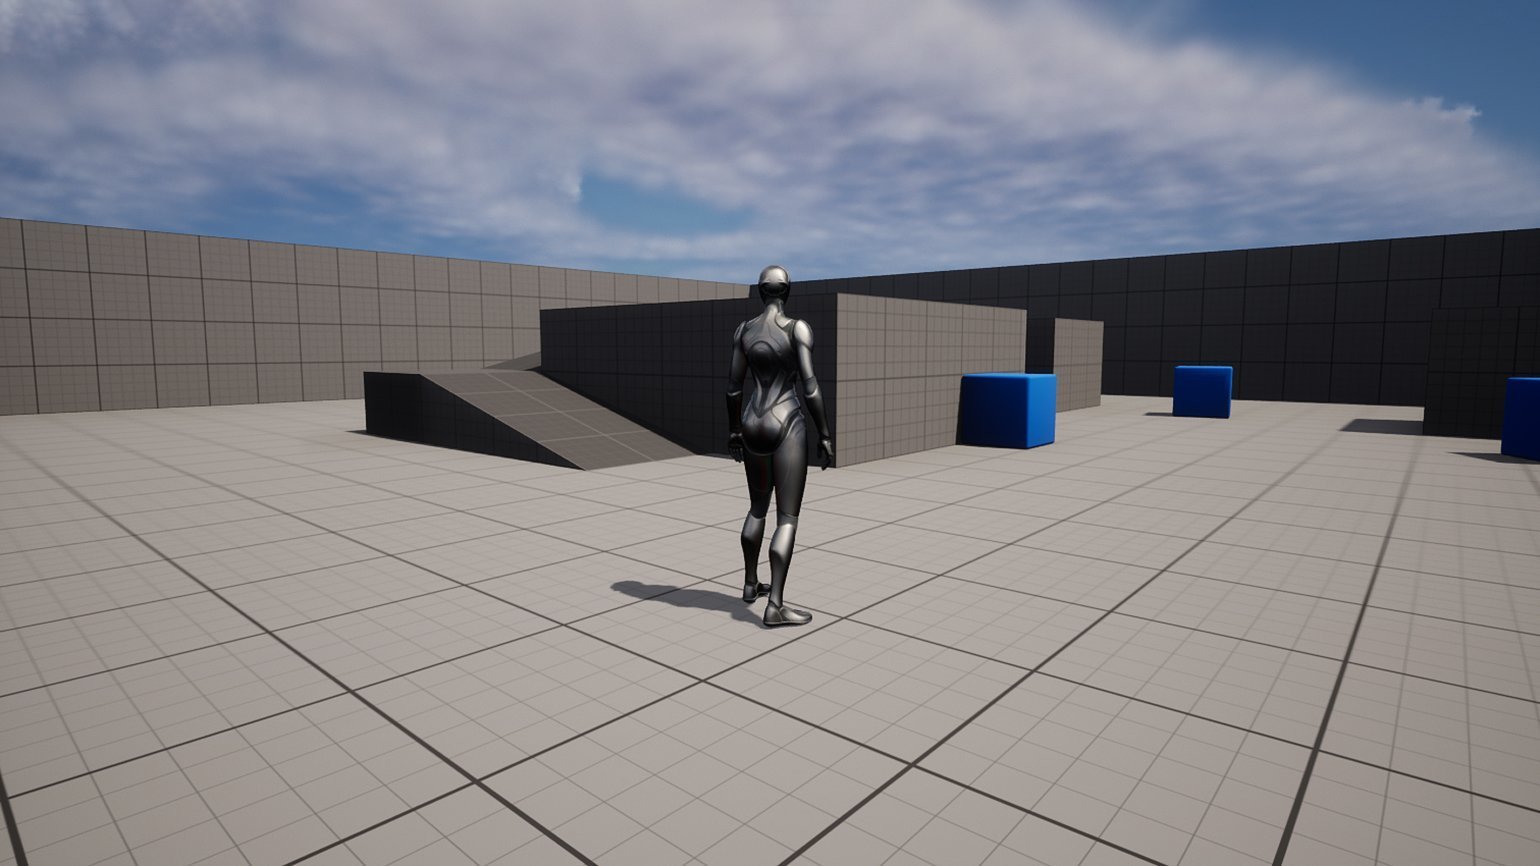
Third Person — шаблон для игр от третьего лица.
Top Down — шаблон для игр с видом сверху. Подойдёт для пошаговых тактик, шутеров с видом сверху и изометрических пазлов.

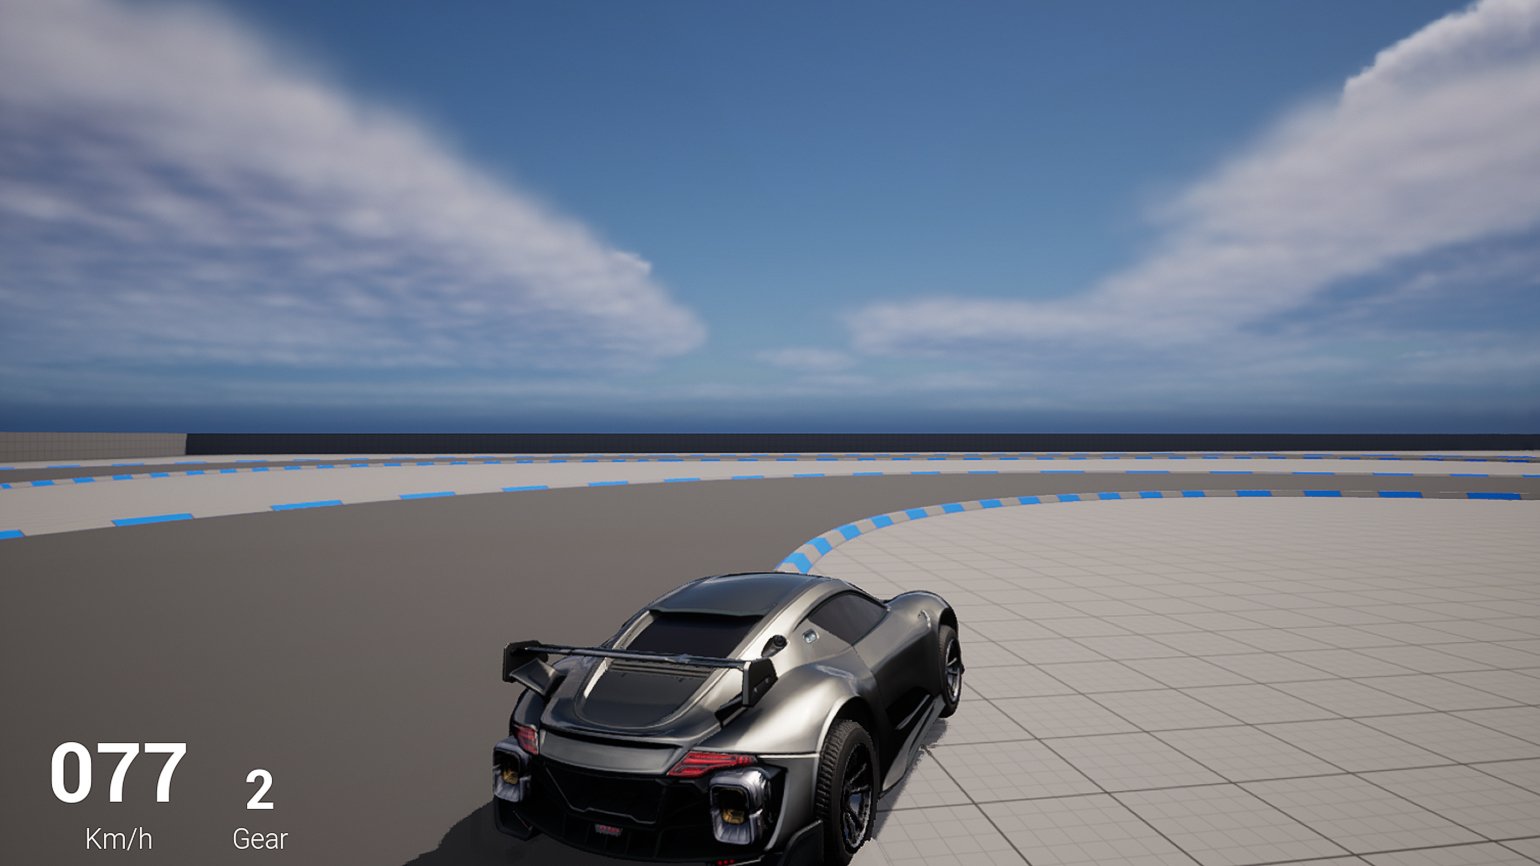
Vehicle — шаблон для гоночных игр. Включает в себя стандартный и комплексный режимы (для аркадных и реалистичных гонок).
Handheld AR — основа для разработки приложения в дополненной реальности для iOS или Android. В этот шаблон включена логика сканирования среды для сбора данных и последующего создания интерактивных плоскостей в виртуальной сцене. Более подробную информацию можно получить в официальной документации.
Virtual Reality — шаблон на блюпринтах для VR‑приложения на базе Open XR . Включает в себя логику для телепортов и базового ввода — например, захвата и прикрепления предметов к руке.
Примечание
В стандартном наборе игровых шаблонов заявлены пресеты для остальных жанров, которые вы могли видеть в Unreal Engine 4. К ним относятся Flying (основа для летательных симуляторов), Puzzle (основа для игр, к примеру, в жанре match‑3), Side Scroller (основа для платформера) и многие другие. Они не вошли в текущую версию движка, но могут появиться в следующей.
Film / Video & Live Events
Секция отведена проектам для смешанных съёмок (live‑action + компьютерная графика) и Virtual Production.
Virtual Production — шаблон для одноимённых проектов. Включает в себя работу с виртуальной камерой, смешанными съёмками, SDI ‑видео и рендерингом.
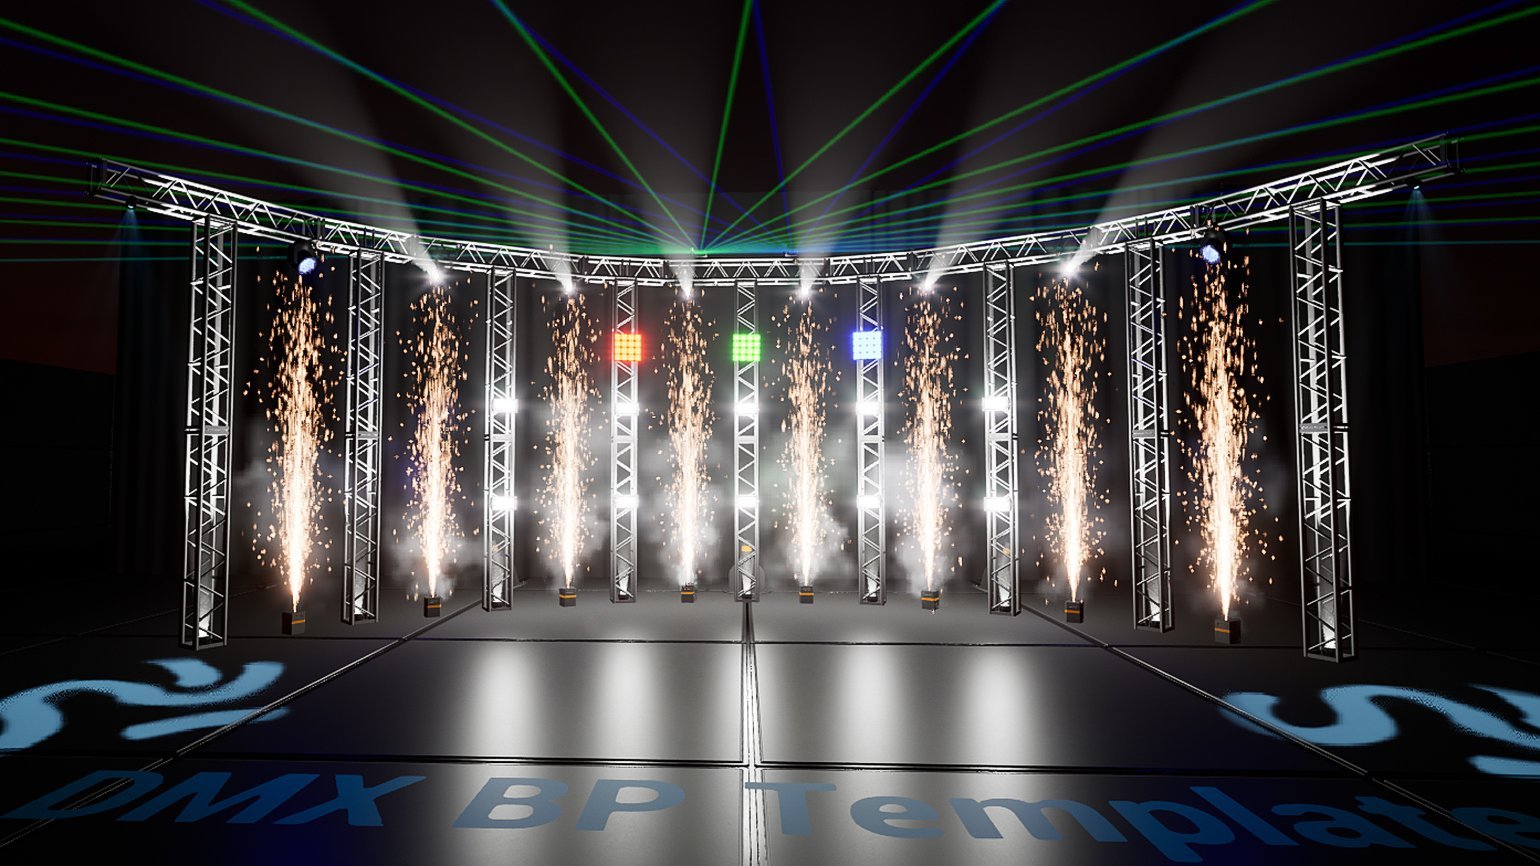
DMX — пресет для live‑ивентов с технологией DMX. Используется для превизов различных шоу и концертов с использованием профессионального освещения.
InCameraVFX — шаблон со всеми необходимыми блюпринтами, плагинами и настройками для стартовых съёмок проекта в Virtual Production с использованием LED‑панелей.
Architecture
В этом разделе собраны шаблоны для визуализаций различных дизайнерских и архитектурных проектов.
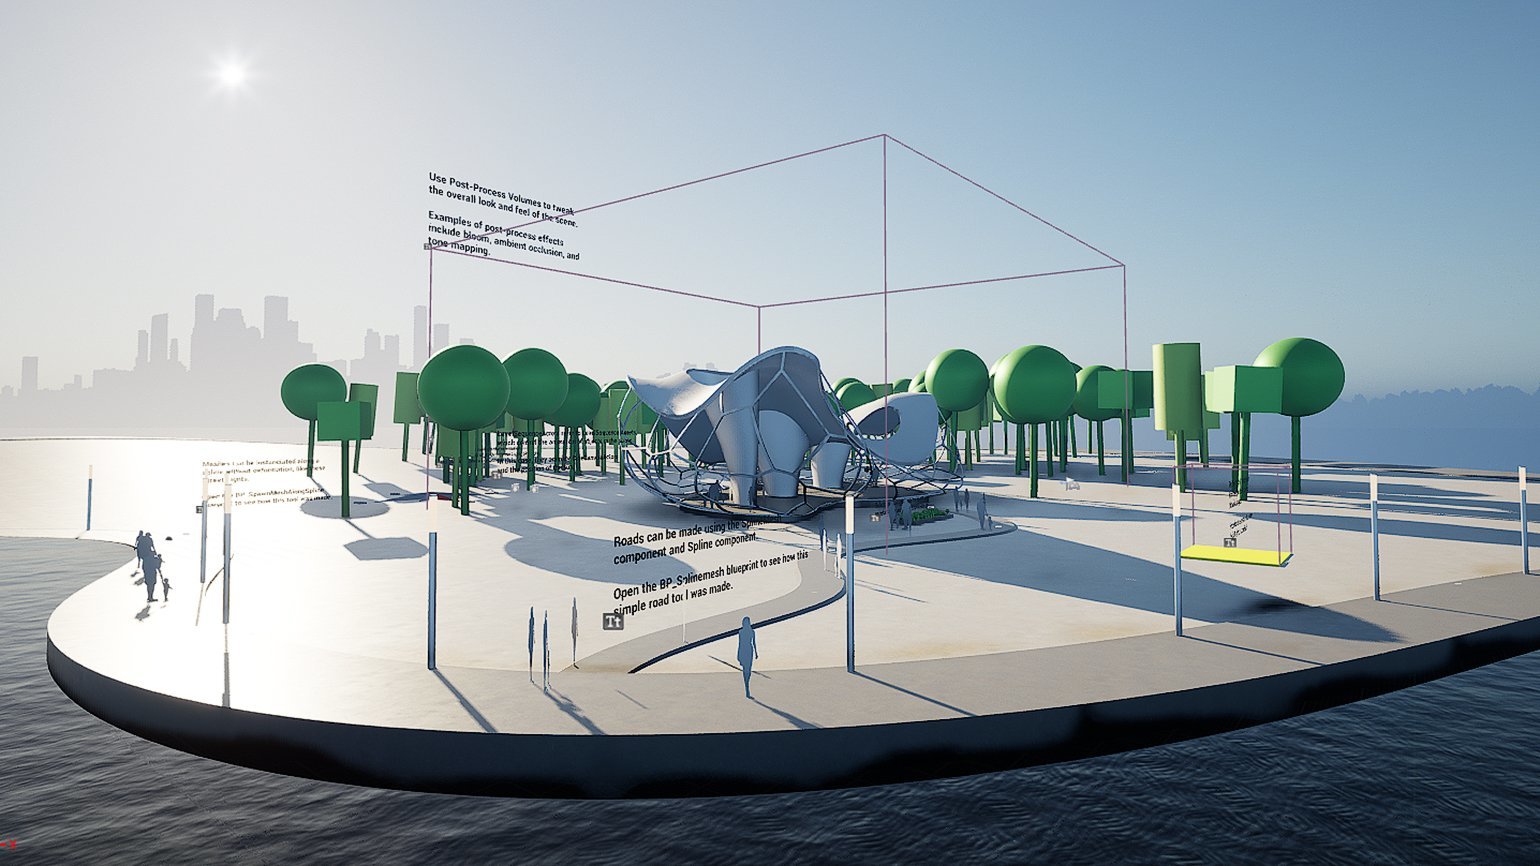
Archvis — шаблон для архитектурной визуализации с наглядным примером интерьера и экстерьера, возможностью рендеринга, анимациями и освещением. Помогает быстро изучить основы архитектурной визуализации в Unreal Engine 5.
Hololens Viewer — основа для совместной работы с промышленными или архитектурными объектами на базе Microsoft HoloLens.
Design Configurator — с помощью набора инструментов из этого шаблона можно создать архитектурную визуализацию с анимацией, различными настройками видимости объектов, разными ракурсами камеры и переключением на разные стадии/формы объекта. Подойдёт, к примеру, для презентации застройщика.
Collab Viewer — ещё один шаблон для совместных проектов в области архитектуры и промышленности, но уже для десктопа и VR.
Handheld AR — шаблон для дополненной реальности.
Automotive Product Design & Manufacturing
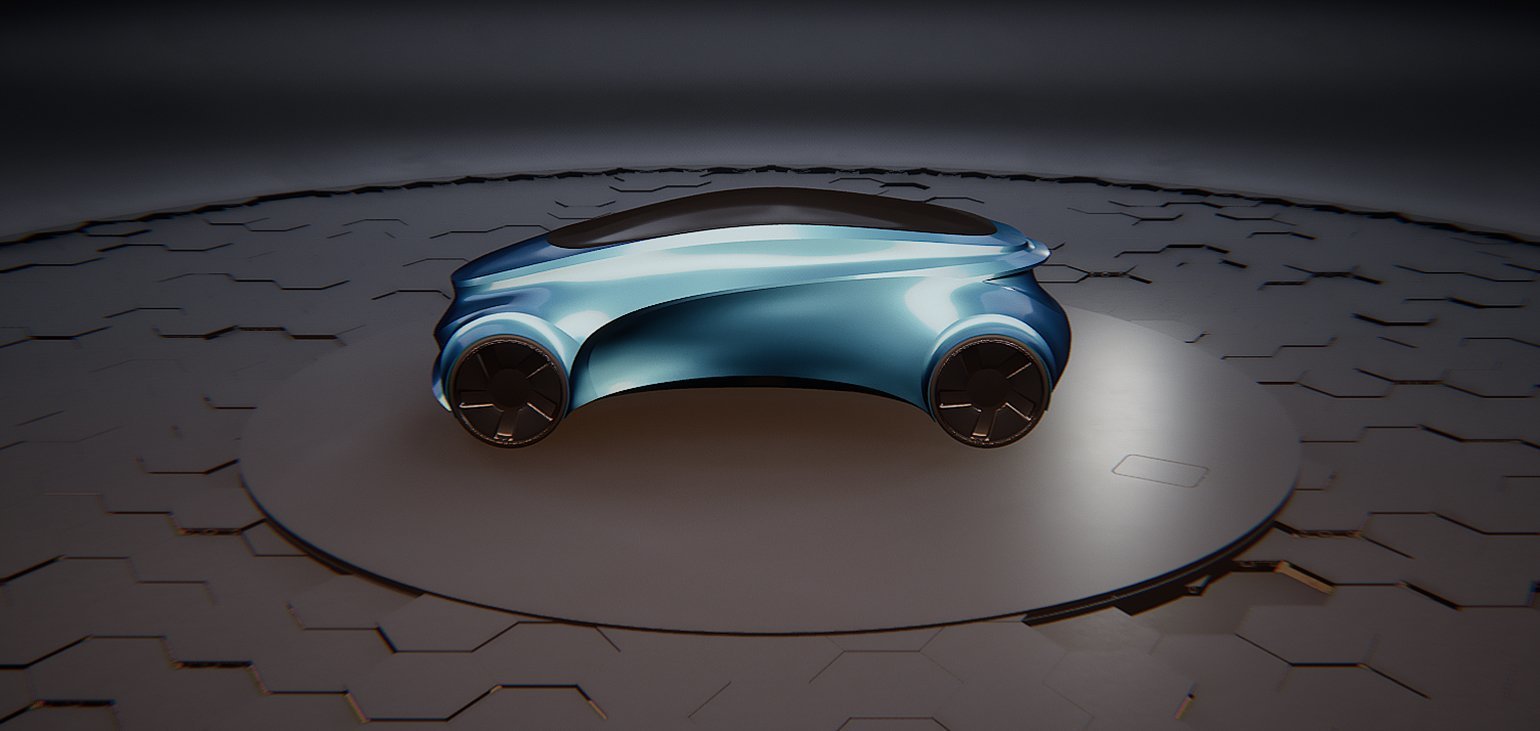
Раздел посвящён проектам на автомобильную тематику. Также здесь можно создавать различные приложения для других сфер промышленности.
Photo Studio — создание качественных рендеров автомобиля для презентаций и синематиков в формате изолированной студии.
Collab Viewer — то же самое, что и в разделе архитектуры.
Product Configurator — шаблон для приложения, позволяющего кастомизировать 3D‑модель условного товара.
Hololens Viewer и Handheld AR аналогичны шаблонам из предыдущих групп.
Продвинутый пользователь может разрабатывать свои уникальные шаблоны из уже созданных проектов. Подробнее об этом можно узнать в официальной документации.
Знание специфики каждого пресета поможет подобрать правильную основу для вашего проекта. После выбора необходимого шаблона и его сопутствующих настроек нужно кликнуть по кнопке Create в правом нижнем углу окна. Спустя несколько минут загрузится окно редактора Unreal Engine 5 с вашим первым проектом.
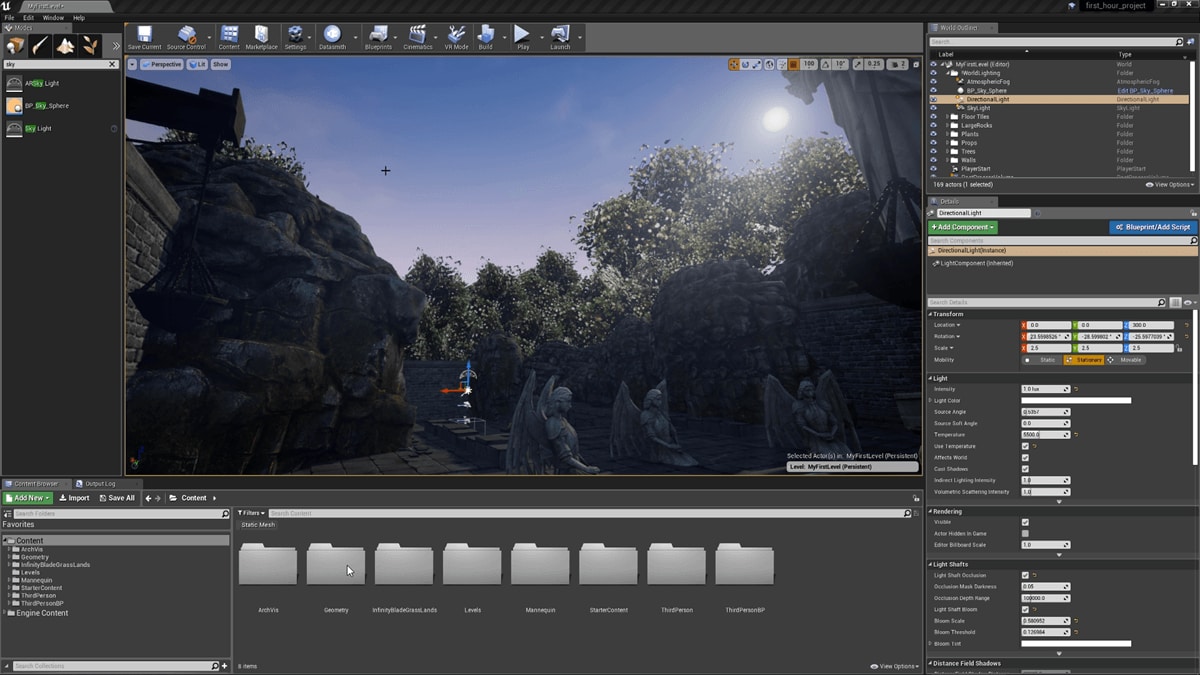
В следующем уроке мы рассмотрим функционал редактора Unreal Engine 5, а также познакомимся с его интерфейсом и базовой навигацией во вьюпорте.
Стороннее приложение для интеграции виртуальной реальности.
Последовательный цифровой интерфейс, используемый на съемочных площадках.